Edit any tool and develop your own step by step process inside work sessions.
Jan 10, 2021
Edit tools and define the best way to guide your work sessions.
Editing or creating your own tools is often necessary to better guide your team and provide a clear step-by-step process so that team members, clients or stakeholders can participate in the process whether they are working synchronously or asynchronously.
You can create a tool from scratch, or you can get a headstart by using an existing tool from the Nova library.
Edit an existing tool.
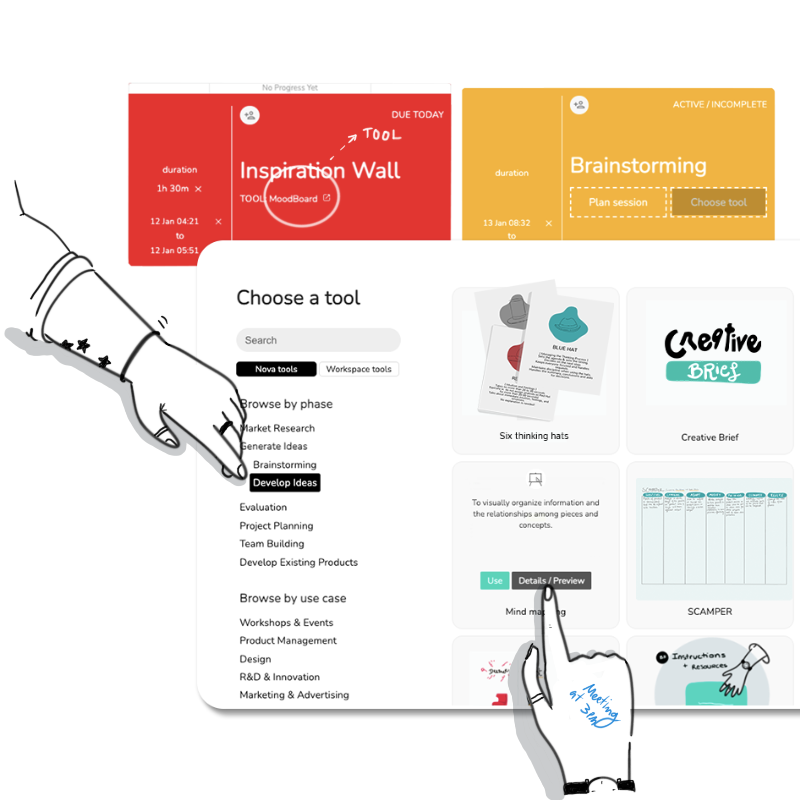
To start, create a new session inside a project (you can have a project where you save all your tools and processes). Select which tool you would like to use as a starting point from the tool finder by clicking “choose tool”. Once you have your chosen tool, enter the session by clicking the session name.
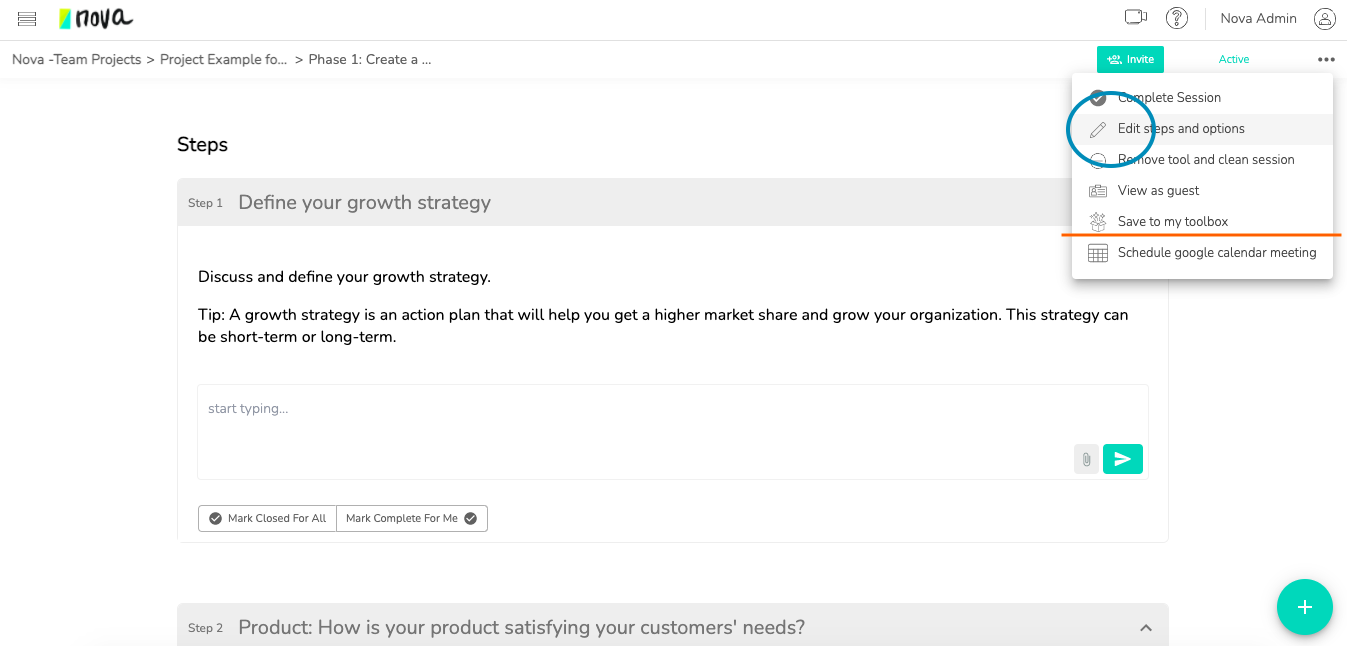
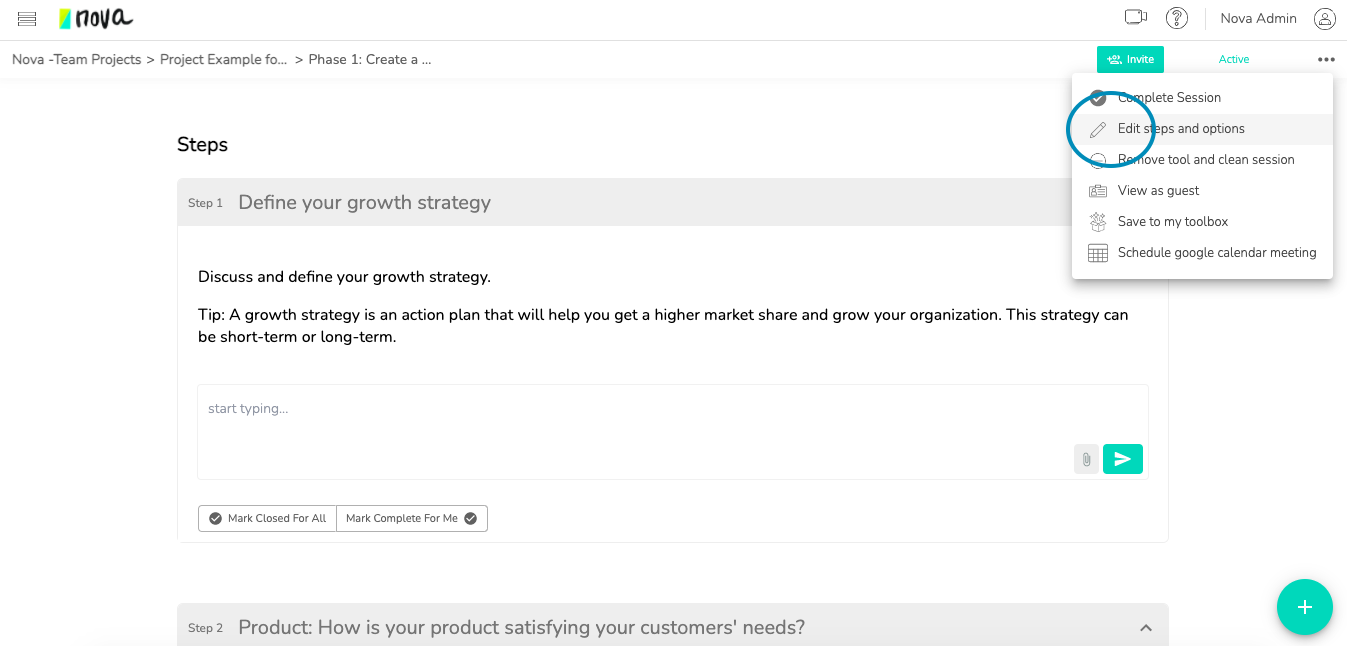
To edit the steps and guidelines for the session, find the ellipsis (or 3 dots) in the top right corner of your session, or to the left of your steps sidebar. Click the “edit steps and options” button to make adjustments. Check out this guide for more details.
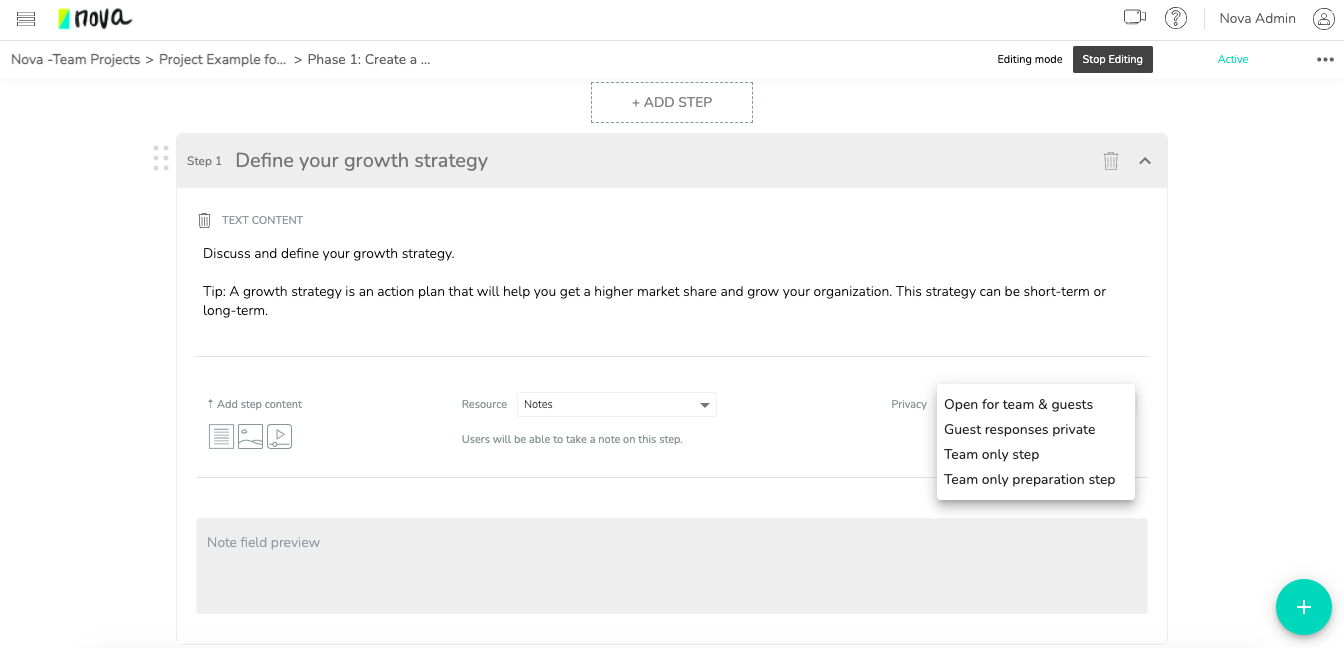
You can edit the “how to use this tool section”, any of the steps, or choose a different workspace. For example, you can add an additional step or resource or choose the list workspace instead of the whiteboard.
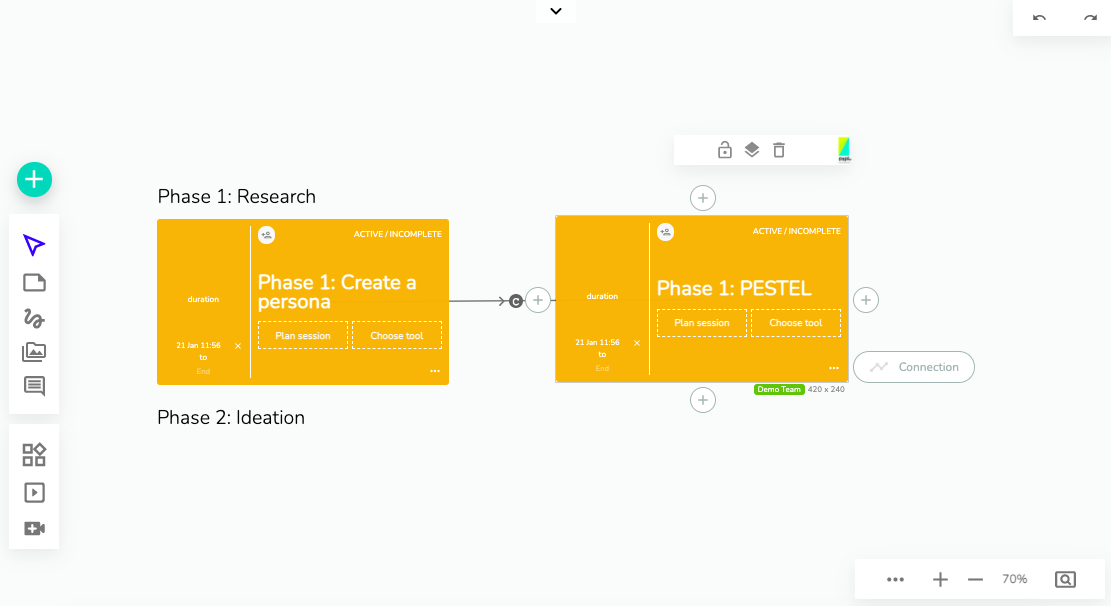
If you are editing a tool using a whiteboard, use the toolbar on the left side of the session to add notes, draw with a pen, add media or comments. If you want to edit material that is already on the whiteboard, ensure you are using the “cursor” tool (toggled on/off at the top of the toolbar) and select the item you want to move or edit. If you are unable to select it, press the cursor button, and a set of lock/unlock symbols will appear which you can select. Once you have “unlock” selected, simply click and drag your mouse over the items you want to edit, and click the cursor to make your desired edits. Once you are finished editing your template, you can use the “lock” button to finalize the template to avoid further changes by your participants.
A key feature we recommend using with tools using whiteboards is the frames.
Make sure you mark where each step is located inside the board by using the frame so everyone is redirected to the right area in the board while working…
Create a new tool from scratch.
I have a tool or custom process inside the session: To start, create a new session in your project, or choose the ellipsis (3 dots) in the bottom right corner of a session card and select “remove tool”.
I can see the option”choose a tool”: Click “plan session”, which will open a session for you. Scroll down and select “add steps from scratch” to define the process, the resources, and the type of workspace.
You now have the option of selecting the type of workspace: a list or a whiteboard. That is where your team and external participants will work during the session and will define the kind of interactions and resources they will have available. Both workspaces enable you to provide guidance to your participants, however, they both have individual benefits:
- List:
-
- This session type creates a linear list of steps which can include multiple-choice questions (also known as a multi-selector), individual text submissions (notes), or can even link to a whiteboard to facilitate participation for the specific step in question. You can also decide who participates and how, for example, if a step is only for team members only, or if guests can see each other’s answers. Includes private settings and different step types.
- Whiteboard:
- A whiteboard is used when an entire work session will be facilitated on one board which will hold all of the data generated during the session. You can still provide steps and guidelines for your participants, however, they will access the steps from within the whiteboard. There is no privacy setting here as everyone can see everything added to the whiteboard. You can still decide who can see a step so that you can add instructions for your team, which won’t be visible for guests.
Once you have chosen the appropriate type of workspace, you can proceed to add steps to your session, and/or add designs to any whiteboards involved in your session in the same way you would customize an existing board, detailed above.
Save your Custom Tool (Pro Only)
Pro users have the ability to save their customized tools, including tools created from scratch, or tools edited. To do this, press the ellipsis or 3 dots in the top right of your session and select “save to my toolbox”. You can save the tool by adding a name, a description and categorizing that tool to better find it in the future. Saving to your toolbox will add the tool template to the tool library, found under the “Custom Tools” tab.
