How can I organize and create a project?
Jun 10, 2020
You will learn how to create a project, assign team members and what that means, and discuss the ways to organize a project using the board or list view.
To create a project go to the main menu and click the ‘add project’ button.
From here you can name the project, define the reason you’re creating the project and its specific goal, choose whether you’d like to use a template to start off, and finally define a due date to complete it.
Once created, you’ll right away see the project board view, which is a visualized way to see the sessions within your project.
Here is the project board overview:
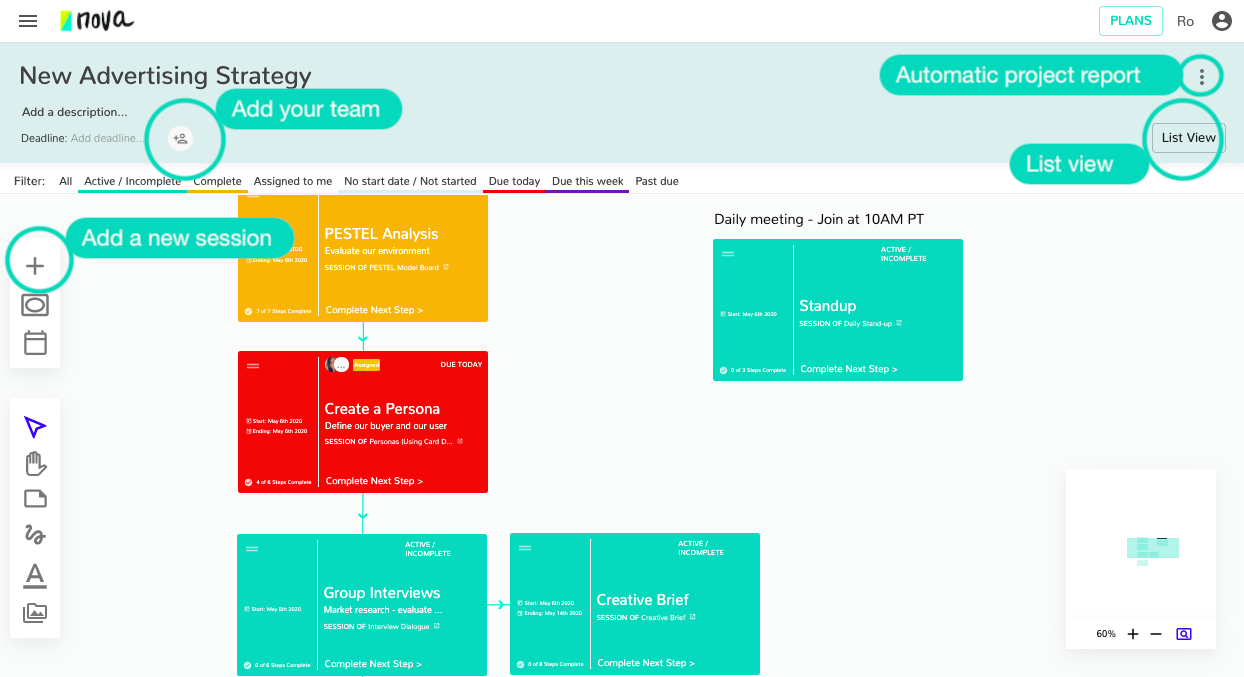
Here it’s recommended that you add any team members you’d like to be a part of this project specifically at the top of the view below the title. At the top of the page, you’ll also be able to edit and modify any information that you’ve defined when you first created your project.
Once you’re satisfied, you can start adding sessions that align themselves with the intended goal of the project. Each session added should have a specific reason for being added that helps get your team closer to the goal set-out in your project description. To add a session, click the plus button and input any details you need to specify. Alternatively, you can add and view sessions through the list view – seen here. If you’d like more information on how to add and prepare a session, please refer to the “create a session and prepare it for your project” video.
Check our video: How to organize and create a project?

